Overview #
As an admin you can create list of clients that you want your team to text, email, or call, which we call “Call Lists”. This can be for an upcoming store event, to try and re-engage customers that have not shopped in 6 months, or any other reason you desire.
Here we will overview how to create, distribute and monitor your call lists as well as some best practices to drive the best results!
Step 1: Create Your Call List #
The call list creation process occurs across two pages – the All Clients page and the Call List page.
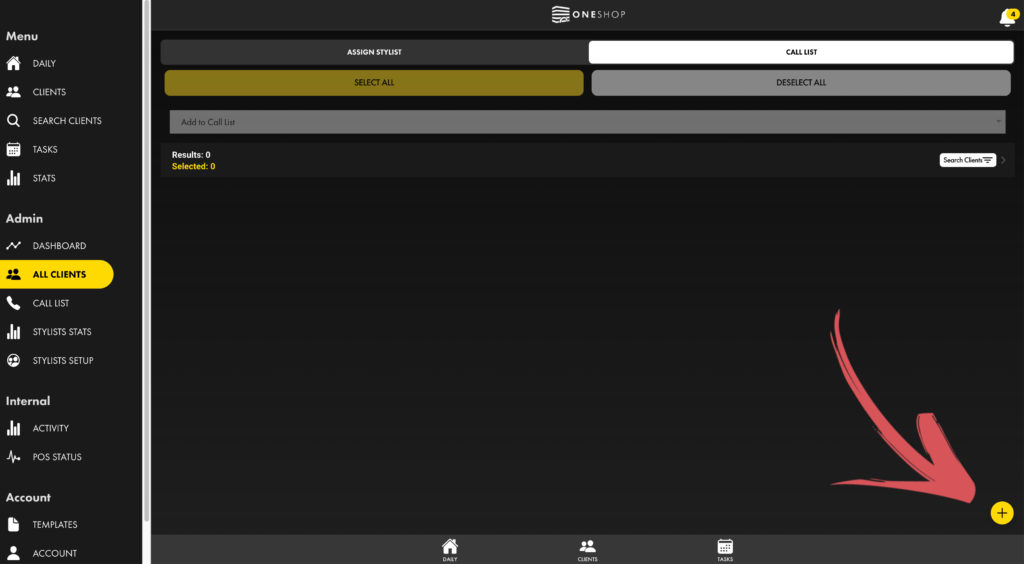
The first thing you need to do when creating a call list is to set up the shell of the call list. You can start this process but hitting the + button in the bottom right hand corner of the screen.
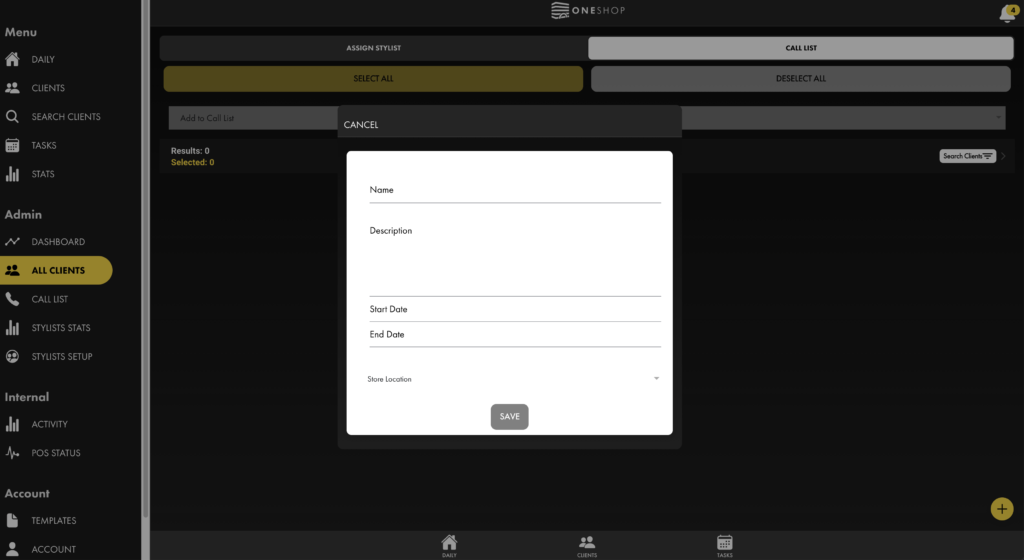
In the pop up you will fill the details that your team will see as soon as you assign the call list. Here is how it is broken down:
- Name – This is the title of the call list. Example is “ABC Brand Outreach”.
- Description – This is where you will put the note you want to leave for your team. Example is “Hey everyone, text all these customers”.
- Start Date – This is the date where your team will see the call list appear in their OneShop app.
- End Date – This is the date it will clear off of your teams app whether they have finished it or not.
- Store Location – This is the location you want to assign the call list to. Even if you only have one location, you still need to select this.
Step 2: Pull Your Client List #
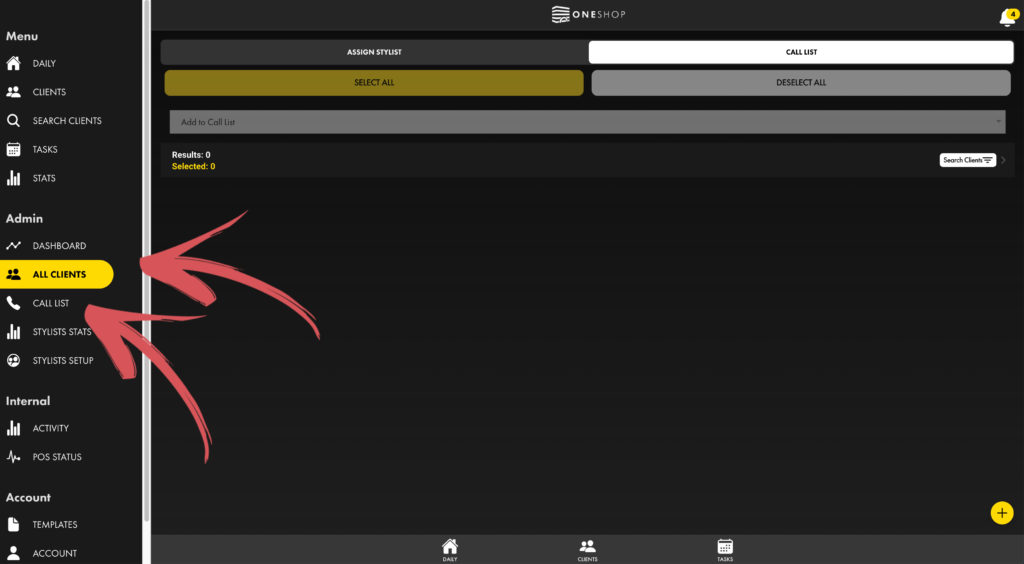
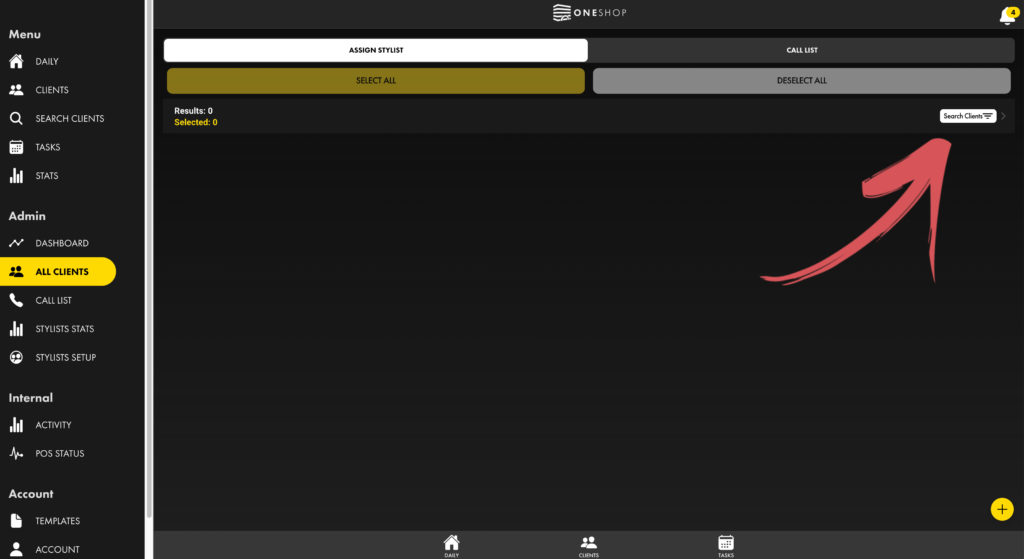
Once your call list is created, you will need to pull the clients that you want to assign to the call list. This is done on the All Clients page.
It is best to pull this list on the “Assign Stylist” section because then you can assign clients if they are unassigned.
When you first click on the All Clients page your search criteria will automatically pull up, but you can also hit the “Search Clients” button to pull up all the criteria in order to pull your client list.
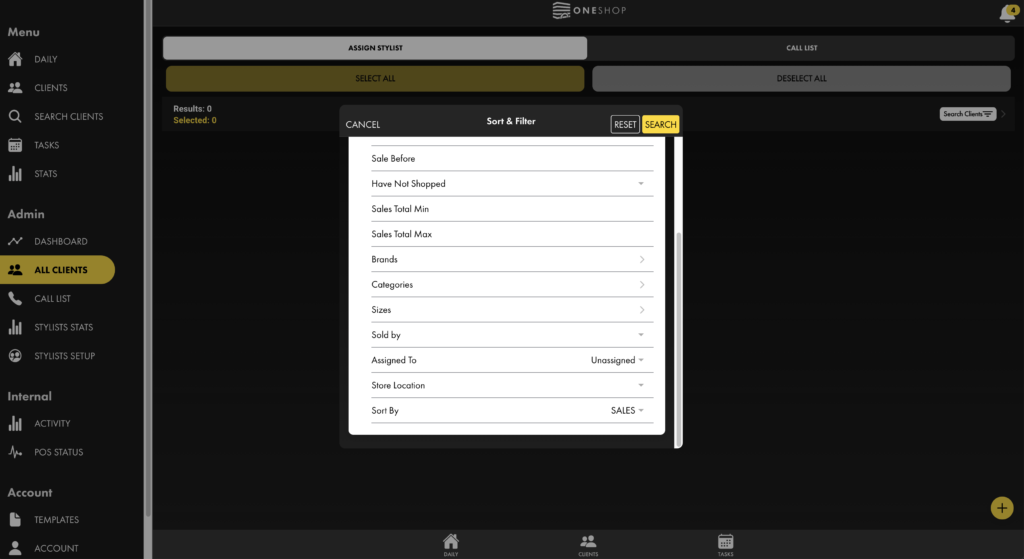
Once you have this open, you fill in whatever criteria you want to pull your list.
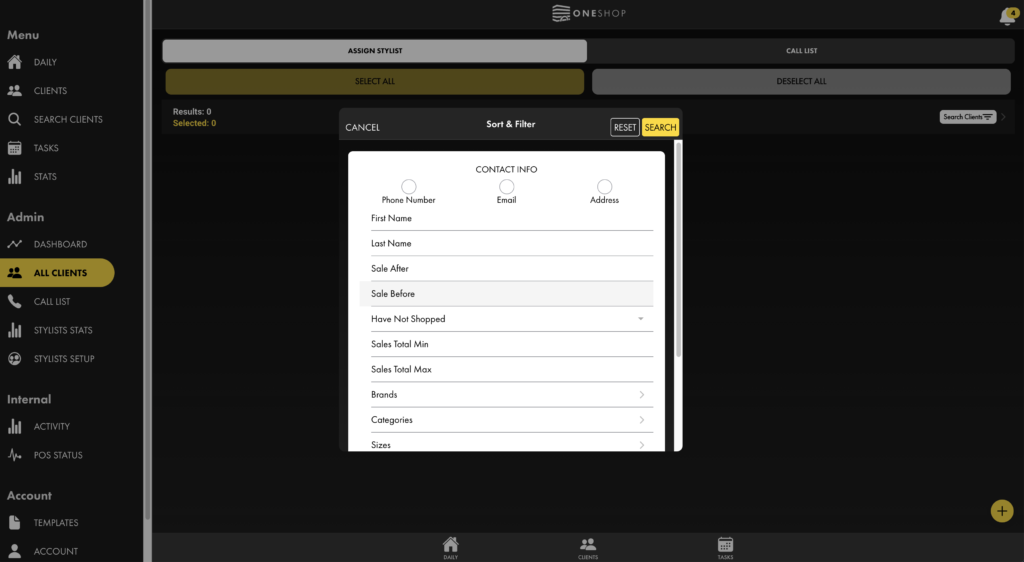
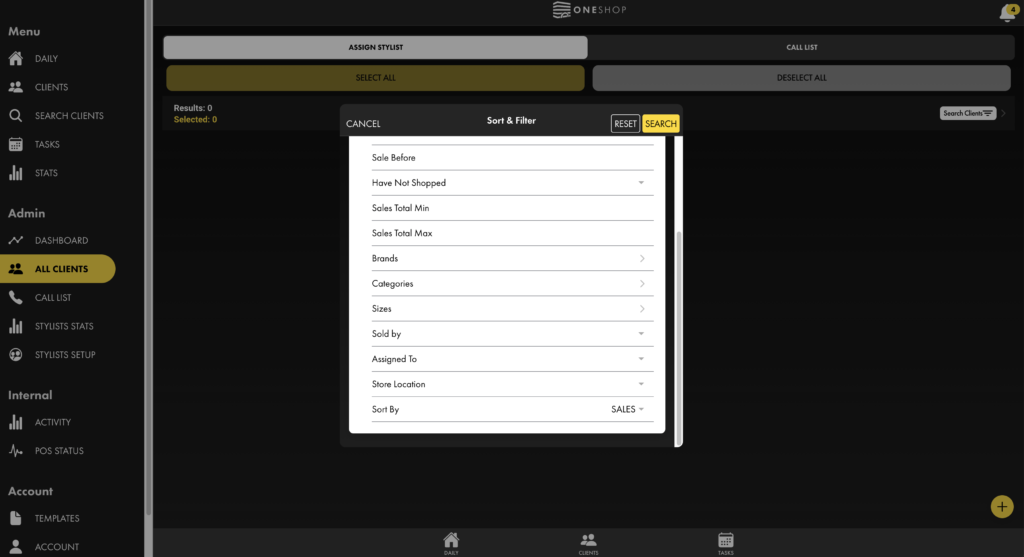
These are defined as:
- Phone number, email, address buttons – This will pull only clients that have these. So only clients who have a phone number, email, or address tied to their profile. This is used to ensure that your team is not getting anyone who does not have contact info.
- First Name and Last Name – Search for a specific client by first or last name.
- Sale After and Sale Before – Here you can pull clients that purchased in a certain date range. So they purchased after a certain date or before a certain. This would be used to say pull all clients who bought in November.
- Have Not Shopped – This is used to pull clients that have not shopped in certain time frames like have not shopped in 30 days.
- Sales Total Min and Max – This is where you can see clients that have spent above or below a certain amount.
- Brands – This is where you pull clients that bought a certain brand.
- Categories – This is where you can pull clients that purchased a certain category.
- Sizes – Here you can pull clients that purchased certain sizes
- Sold By – This will pull all clients sold to by certain sales people.
- Assigned To – This is will pull all clients assigned to certain sales people so this is what is showing in their accounts.
- Store Location – This will pull all clients that purchased the most at a certain location so are “assigned” to that location.
- Sort By – This will be the way that your results are sorted.
Pro tip – When making a call list it is always a good idea to see which clients are not assigned to anyone, which would mean they would not be on anyone’s call list. Here you can then assign them to a sales associate in order to make sure they appear for someone to contact.
Step 3: Add Clients to Call List #
Once you have your list set, you can toggle to the “Call List” section of the All Clients tab.
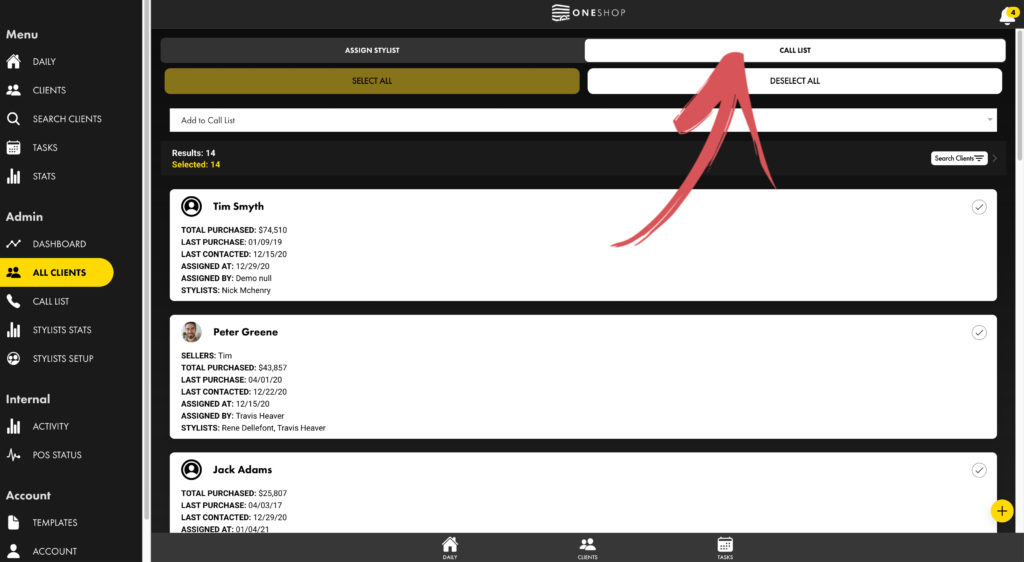
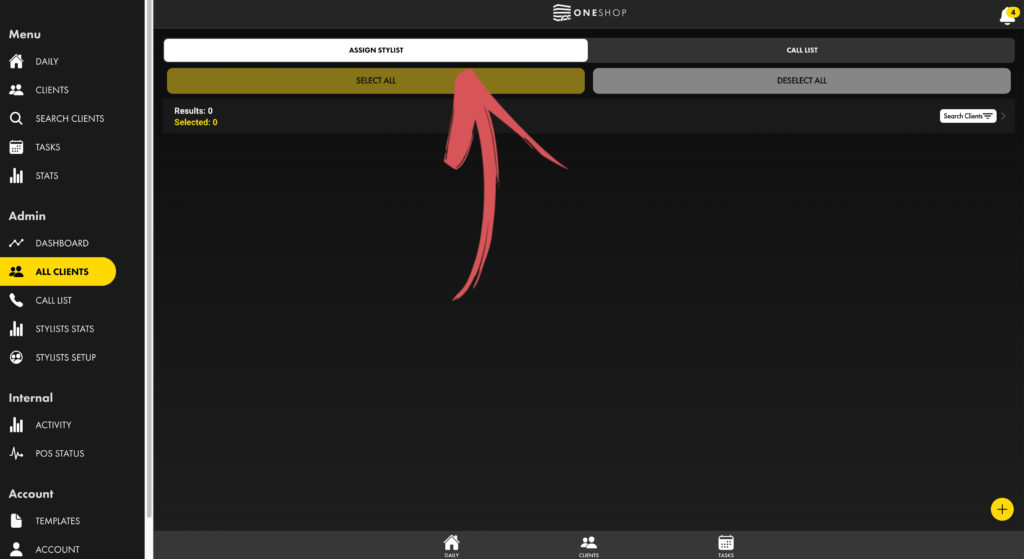
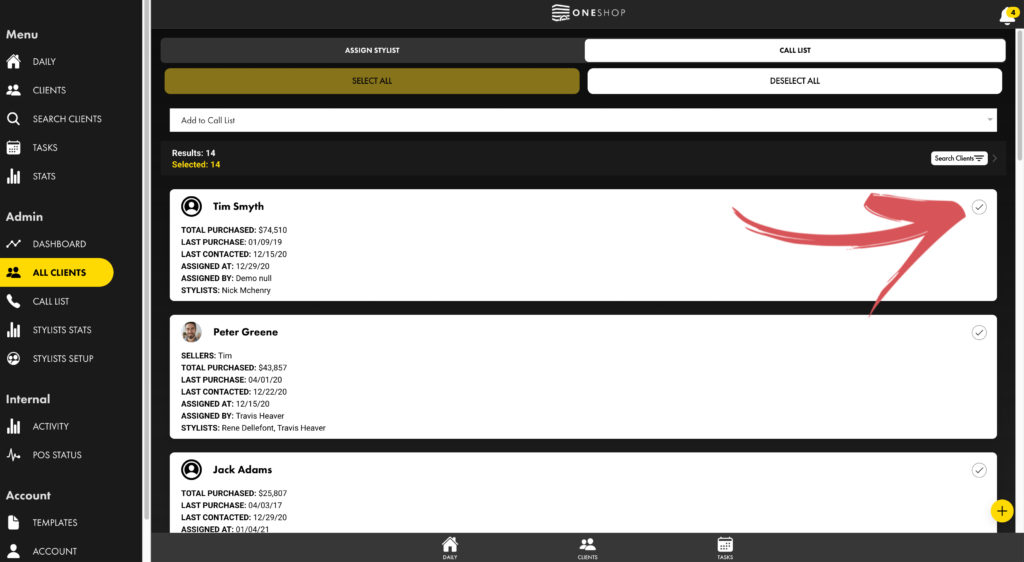
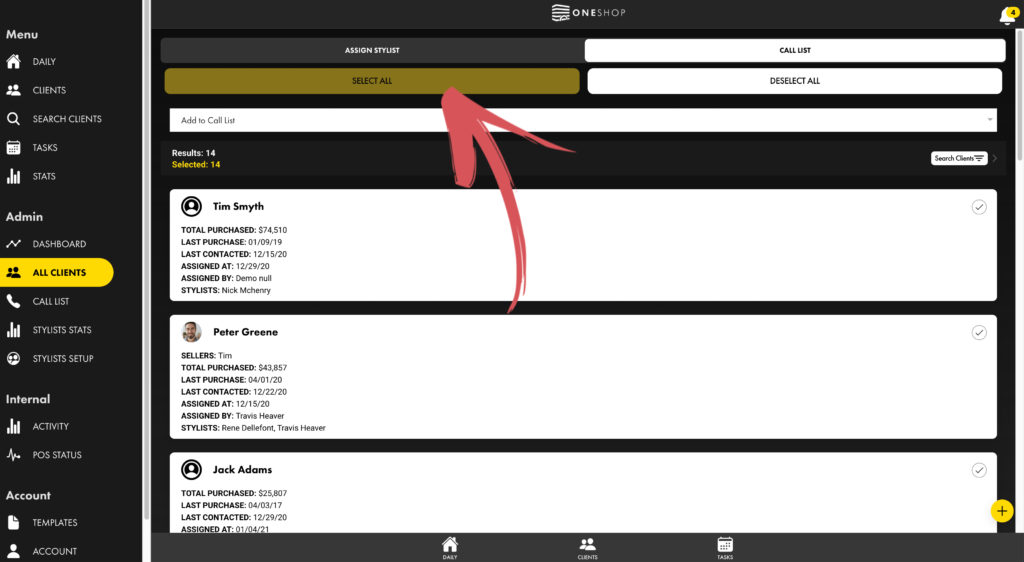
You can either choose which clients to add to your call list by hitting the radio buttons on the individual clients themselves, or you can hit the “Select All” button to add all clients that you have pulled to a call list.
Once you have your clients selected, you simply hit the “Add to Call List” button and select the call list that you want to add the clients to. Make sure you actually click the call list before hitting Okay.
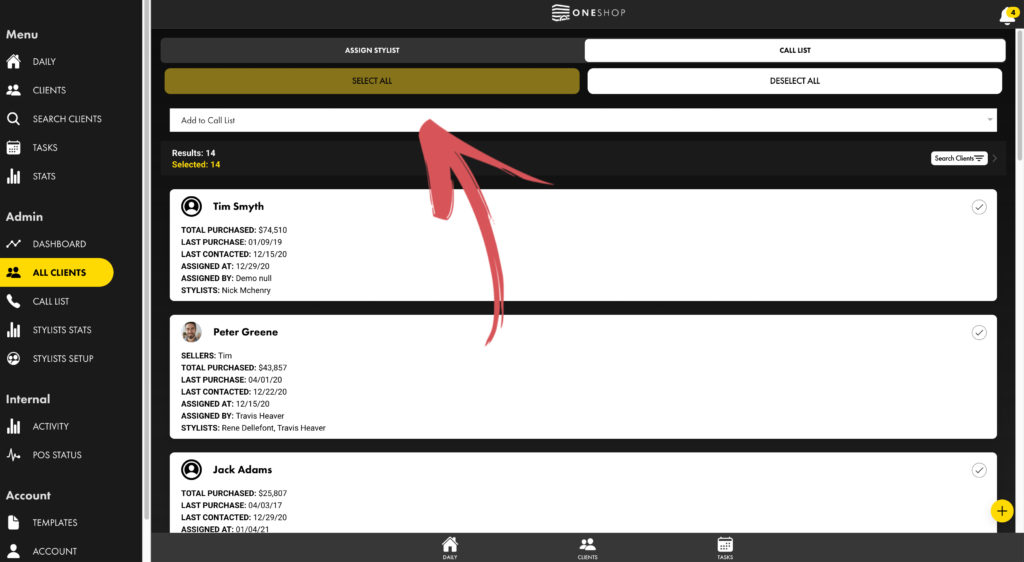
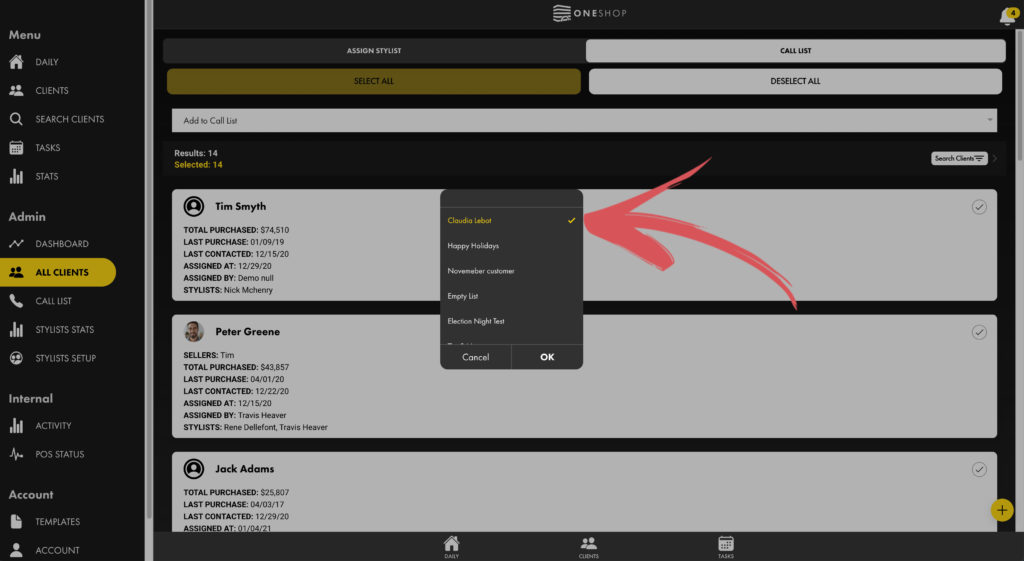
Once you have done this, you will get a success message that says you have successfully assigned the clients to the call list!
Note – each stylist will only see the clients that are assigned to them on their call list.
Step 4: Monitoring Your Call List #
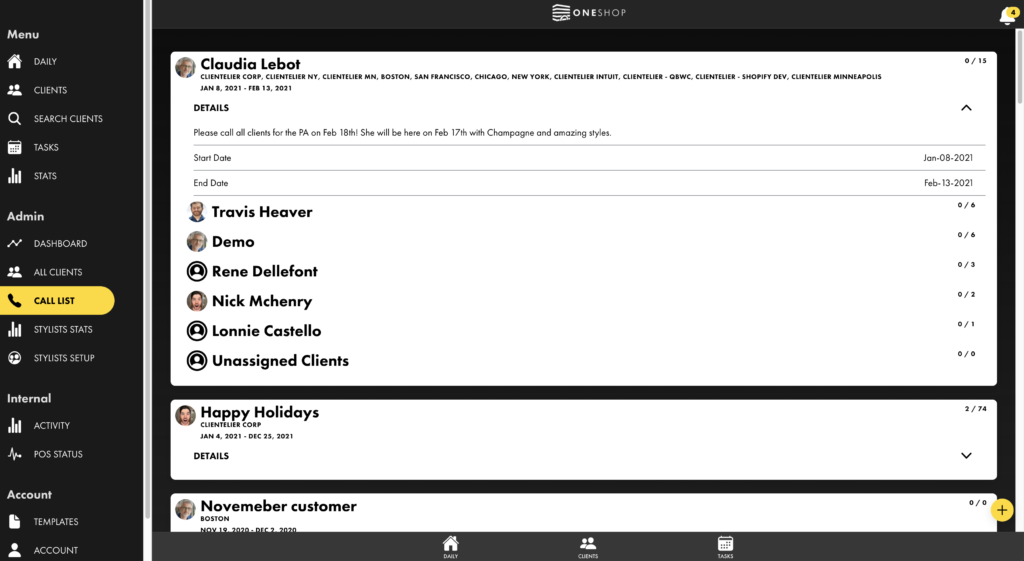
Once you have added clients to your call list, you can check to see which clients have been assigned where as seeing the current activity by going to the Call List page.
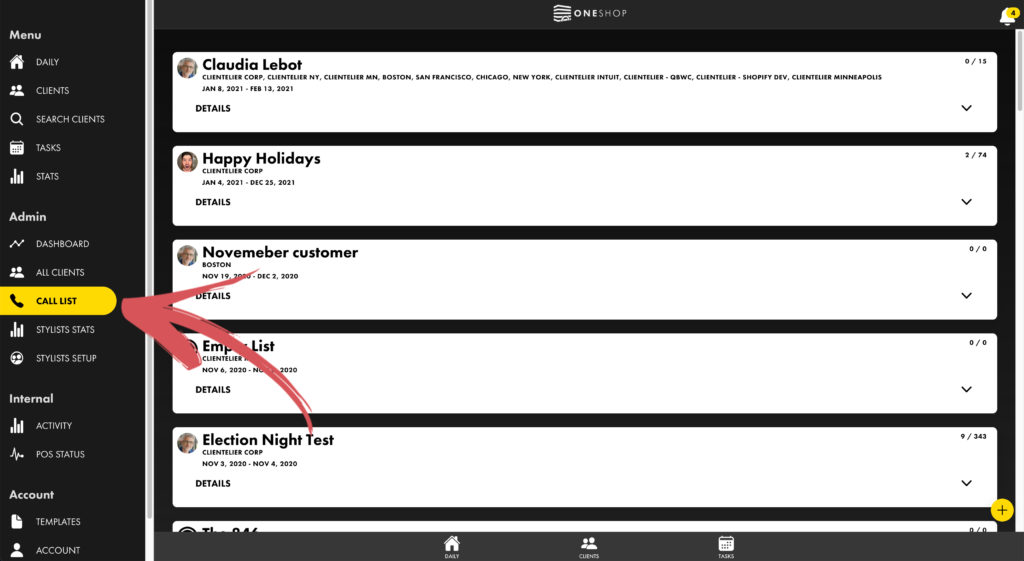
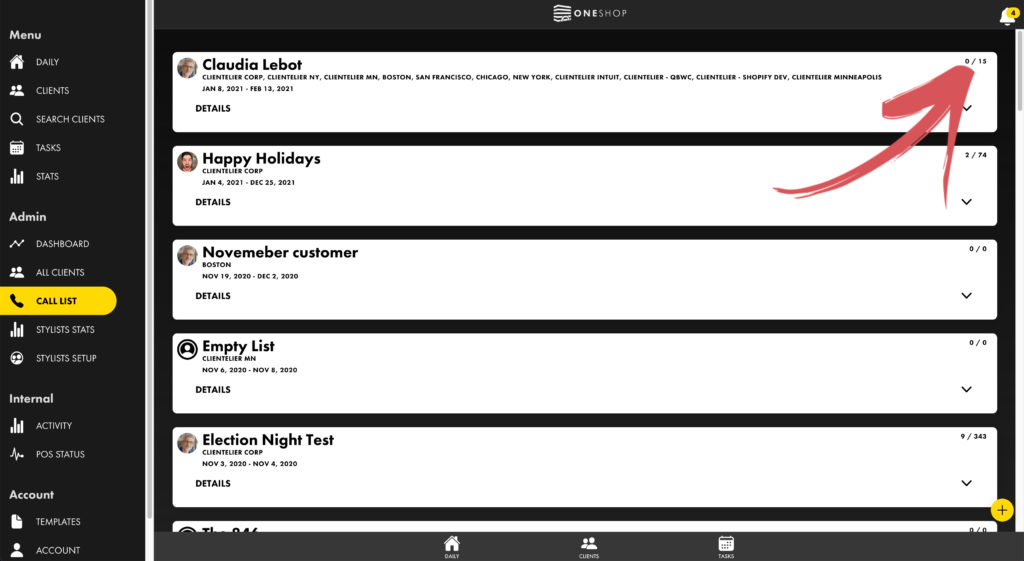
Here you will see all your created call lists and before clicking into any of them will see how many clients were added to the call list.
If you want to see the details of the call list, hit the arrow to expand the details.
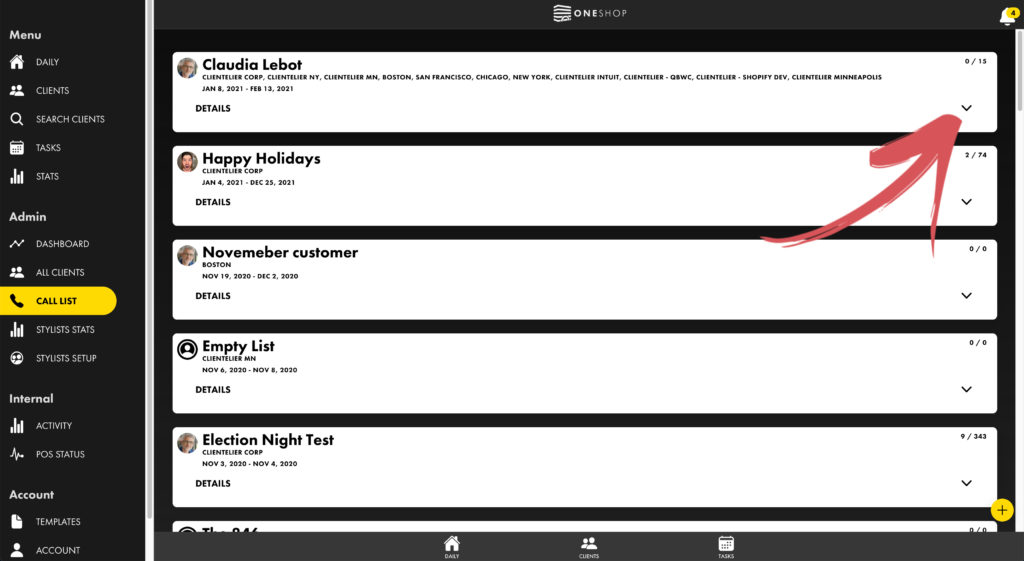
Here you will see how many clients have been assigned to each of your team and how many of the communications have been completed.
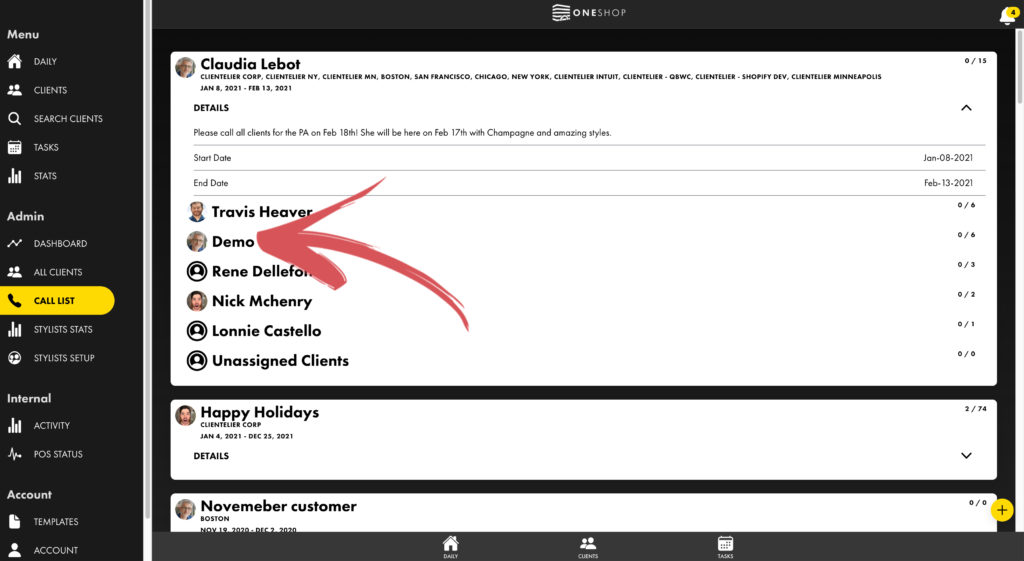
If you want to see the individual clients that are on the stylist’s call list, you simply hit their name, and it will expand.
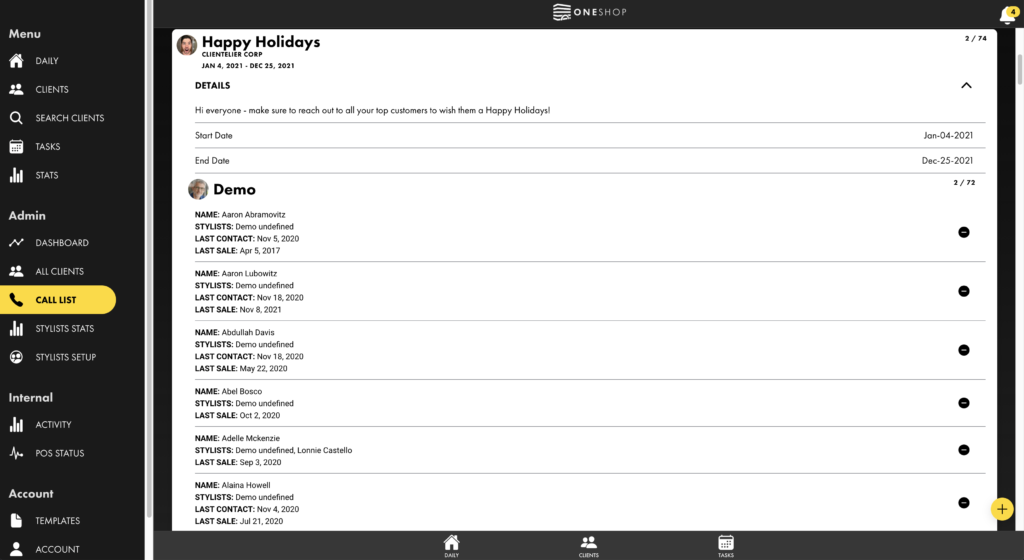
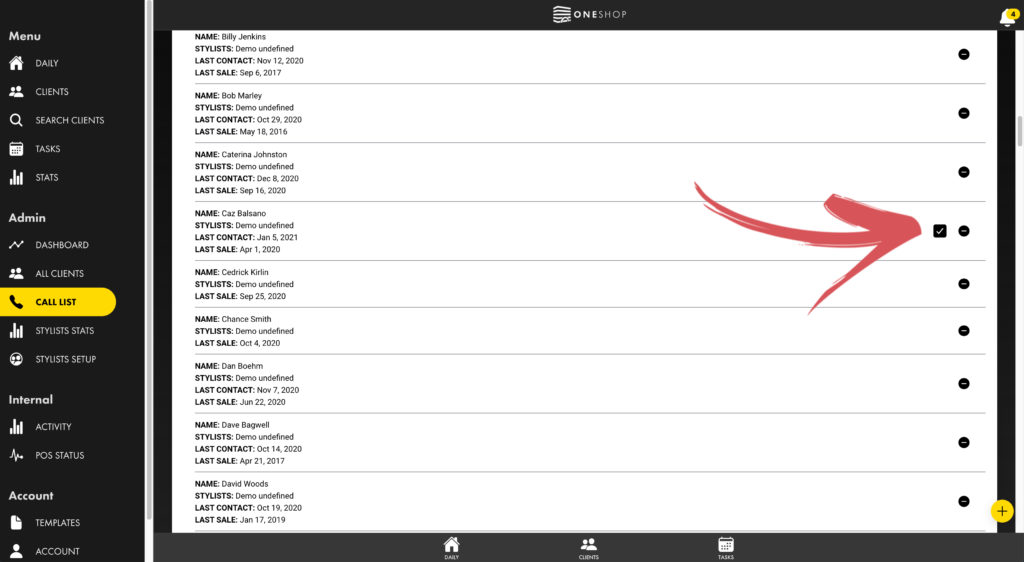
Once a client has been contacted, you will see a check mark appear next to the name.
What the Stylist Sees #
In the stylist’s app, they will see their call list appear on their Daily Tab in the Call List section.
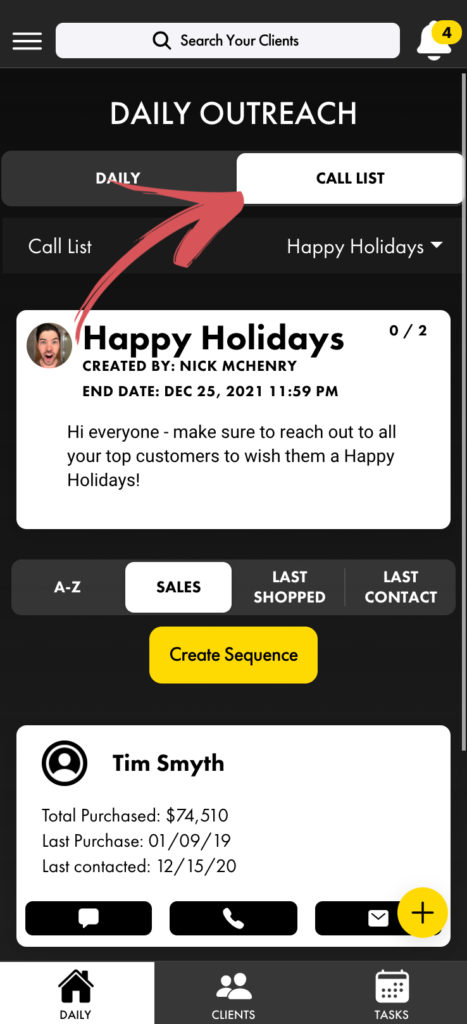
Once again, this will only show up on the start date of the call list.
As they do their outreach, the clients from the call list will clear off of the list.